
In this post I am developing a simple Flask login page with two-factor athentication system using CronDock sms2fa mini app
In the previous article I discussed different approaches to schedule a method to run at a specific time in python. In this article, I want to talk about developing Two-Factor-Authentication (2FA) in python.
Two factor authentication process is a must to have for most of the applications these days. The idea behind it is to authenticate the user using two unrelated methods. Most of the time, the first method is using a conventional username/password. The second method, however, could be anything from using a randomly generated number, qr code, calling or sending a message to hardware security keys.
In this article, I am going to describe an easy method for developing a two-factor authentication system using text message (SMS).
For this example, I am going to build a simple login page in flask and use CronDock's sms2fa mini app to handle two-factor authentication via text message.
Please keep in mind that provided code is not suitable for production environment.
So let's start with installing the packages:
python -m pip install flask flask-login flask-wtf WTForms pyjwt
We use "SQLite" for our database, and we are going to need two tables for this example:
users: for each user it keeps the username, password and phone numbertwo_factor_authentication: keeps track of authenticated phone numbers
sqlite3 example.db
>
create table users(
id INTEGER PRIMARY KEY AUTOINCREMENT,
username text not null,
password text not null,
phone text not null
);

create table two_factor_authentication(
phone text not null,
confirmed INTEGER not null
);

insert into users (username, password, phone) values('testuser','ABC123', '18009998877');

.q
Note that we are also adding a user to the users table here. Keep in mind that you should also include the country code for the phone number.
Next, we need to create a template HTML page for our flask app, and let's call it html_template.html:
html_template.html:
<!DOCTYPE html>
<html lang="en">
<body>
     {% with messages = get_flashed_messages(with_categories=True)%}
      {% if messages %}
       {% for category, message in messages %}
        <div class="alert alert-{{ category }}">
         <h5>{{ message }}<h5>
        </div>
       {% endfor %}
       {% else %}
        {% block info %}
        {% endblock %}
      {% endif %}
     {% endwith %}
</body>
</html>
In this template, we are going to show any messages that are produced by flash command in the flask app.
If there is no message, we show the block render by login.html (which is defined below).
We also need a login page, which we call it login.html:
login.html:
{% extends "html_template.html" %}
{% block info %}
<form method='POST' action="">
 <fieldset class="form-group">
  <h1>Log In</h1>
  {{ form.hidden_tag() }}
  <div class="form-group">
   {{ form.username.label(class="form-control-label")}}
   {{ form.username(class="form-control form-control-lg")}}
  </div>
  <div class="form-group">
   {{ form.password.label(class="form-control-label")}}
   {{ form.password(class="form-control form-control-lg")}}
  </div>
 </fieldset>
 <div class="form-group">
  {{ form.submit(class="btn btn-outline-info")}}
 </div>
</form>
{% endblock info %}
In the login page, we have a form which provides two text fields for the user to fill, one for username and one for password.
It also has a submit button for the user to submit their username and password to login.
We have to create the FlaskForm class for the above form.
We call that class SignInForm and create it in forms.py and it is going to need 3 fields: username, password and submit field.
forms.py
from flask_wtf import FlaskForm
from wtforms import StringField, PasswordField, SubmitField
from wtforms.validators import DataRequired
import sqlite3
class SignInForm(FlaskForm):
    username = StringField('Username',validators=[DataRequired()])
    password = PasswordField('Password',validators=[DataRequired()])
    submit = SubmitField('Login')
Finally, for the main flask app, which we call it flask_app.py, I will explain different sections of it one by one.
First, imports and top definitions:
flask_app.py
 from flask import Flask
 from flask import render_template, flash, request, jsonify
 import sqlite3
 from flask_login import login_user, UserMixin, LoginManager
 from forms import SignInForm
 import time
 import requests
 import json
 import jwt

 app = Flask(__name__, template_folder='.')
 app.debug=True
 app.config['SECRET_KEY'] = 'some-secret-value'

 login_manager = LoginManager(app)
 login_manager.login_view = "login"

 ...
In this section, we are importing some methods from flask framework.
We are also using some classes and methods from flask_login to handle the login and firs part of two factor authentication process.
We import the SignInForm class we created from the forms.py file.
We are also going to use a couple of other libraries, including sqlite3 (to communicate with our database), requests (to send HTTP requests to CronDock api) and jwt (to encode/decode json tokens).
Next in the definitions, we are creating a Flask app, and setting a SECRET_KEY for it.
Then we have some definitions for login_manager that handles login process.
Next we are going to define a User class like this:
flask_app.py
 ...

class User(UserMixin):
    def __init__(self, id, username, password, phone):
         self.id = id
         self.username = username
         self.password = password
         self.phone = phone
         self.authenticated = False
    def is_anonymous(self):
         return False
    def is_authenticated(self):
         return self.authenticated
    def is_active(self):
         return True
    def get_id(self):
         return self.id

...
Above is a simple user class which stores username, password and phone number of the users.
Next, let's define our login_manager.user_loader:
flask_app.py
...

@login_manager.user_loader
def load_user(username=None):
    conn = sqlite3.connect('example.db')
    curs = conn.cursor()
    curs.execute("SELECT * from users where username = (?)",[username])
    lu = curs.fetchone()
    if lu is None:
      return None
    else:
        return User(int(lu[0]), lu[1], lu[2], lu[3])

...
This method receives a username and loads the user records from users table of our database (example.db).
If such a user exists, the method will return a User class based on it, otherwise it will return None.
Next, I am going to define the function that sends the 2 factor authentication request:
flask_app.py
...

def send_2_factor_authentication(phone_number):
    token = jwt.encode(
            {"user": "2fa"},
            app.config.get('SECRET_KEY'),
            algorithm='HS256'
        )
    requests.post('https://api.crondock.com/run/sms2fa/', json={
        "data": {
            "to_phone": phone_number,
            "confirm_url": "https://myawesomeapi.url/two_factor_auth",
            "app_name": "Awesome App",
            "authorization": f"Token {token}"
        }
    }, headers={
        "Authorization": "Api-Key XXXXX"
    })

...
This function is the main focus of this article.
The idea behind this function is to send a request to CronDock sms2fa mini app for performing the 2 factor authentication.
The CronDock sms2fa mini app needs a phone number, a confirmation URL and an app name to perform the 2 factor auth.
CronDock sms2fa basically sends a text message (SMS) to the provided phone number saying this message is from your app and asks the user to reply the message with 1 to confirm 2fa and login.
After user replies to the message, CronDock sms2fa will send a POST request to the confirmation URL letting your app know if that phone number confirmed or rejected the login.
For security measures, it is recommended you pass an authorization token to sms2fa and it will use it for authenticating its callback to the confirmation URL.
In the above function, what we are doing first is creating the authorization token using the app SECRET_KEY and a JSON payload.
In this case, we are passing "2fa" as "user" in the JSON payload and encode it along with the app SECRET_KEY using jwt.encode.
Keep in mind that you can create more secure tokens using other methods.
Next we are sending a request to the CronDock sms2fa mini app API endpoint https://api.crondock.com/run/sms2fa/.
The payload for this request needs to be in JSON format, with the following fields under data:
to_phone: the user phone number for two-factor authconfirm_url: an API endpoint on your app which will receive the 2fa confirmation information (I will talk more about this later)app_name: your app name, this will show up on the text messageauthorization: an authorization token that your app will use to authenticate the call toconfirm_url
In the headers, you need to pass the API key you have received after signing up on CronDock .
In the above example, you should replace XXXXX with your API key.
Next, I am going to explain the implementation of the confirmation URL endpoint on your app:
flask_app.py
...

@app.route('/two_factor_auth', methods=['POST'])
def two_factor_authent_received():
    auth_header = request.headers.get('Authorization')
    if not valid_request(auth_header):
        return jsonify({'status': 'error'}), 400
    data = json.loads(request.data)
    phone = data.get('phone')

    confirmed = 1 if data.get('confirmed') else 0
    conn = sqlite3.connect('example.db')
    curs = conn.cursor()
    curs.execute("insert into two_factor_authentication (phone, confirmed) values(?, ?) ",[phone, confirmed])
    conn.commit()
    return jsonify({'status': 'OK'})

def valid_request(auth_header):
    if auth_header and len(auth_header.split(" ")) > 1:
        token = auth_header.split(" ")[1]
        payload = jwt.decode(token, app.config.get('SECRET_KEY'), algorithms='HS256')
        if payload.get("user") == "2fa":
            return True
    return False

...
The two_factor_authent_received() method above will trigger when your app receives a POST request on your API's /two_factor_auth endpoint.
The method, first pulls the header and validates the token sent in the Authorization field.
The token validation is being done via valid_request function, in which we basically pick the token part from the Authorization field and decode it using the app SECRET_KEY via jwt.decode.
If the decoded payload has the "user" field set to "2fa" it is considered as a valid request.
The next part of the two_factor_authent_received() method pulls the phone number and confirmed fields from the request and store it in the two_factor_authentication table in our example.db database.
Note that since sqlite3 doesn't support boolean fields, we convert the confirmed value to integer, setting it to 1 if confirmed is true and to 0 otherwise.
Next, I am going to explain the implementation of the login process:
flask_app.py
...

@app.route("/login", methods=['GET','POST'])
def login():
   form = SignInForm()
   if form.validate_on_submit():
       user = load_user(form.username.data)
       if user and form.username.data == user.username and form.password.data == user.password:
           send_2_factor_authentication(user.phone)
           while True:
               time.sleep(1)
               received, confirmed = check_2fa(user)
               if received:
                   if confirmed:
                       login_user(user)
                       flash(f'Welcome {form.username.data}')
                   else:
                       flash(f'Two Factor Authentication Failed')
                   break
           delete_2fa(user)
       else:
           flash('Authentication failed')
   return render_template('login.html',title='Login', form=form)

def check_2fa(user):
   conn = sqlite3.connect('example.db')
   curs = conn.cursor()
   curs.execute("SELECT * from two_factor_authentication where phone = (?)",[user.phone])
   lu = curs.fetchone()
   if lu is None: # still waiting
       return False, False
   elif lu[1] == 1: # 2fa confirmed
       return True, True
   else: # 2fa failed
       return True, False

def delete_2fa(user):
   conn = sqlite3.connect('example.db')
   curs = conn.cursor()
   curs.execute("delete from two_factor_authentication where phone = (?)",[user.phone])
   conn.commit()
...
Finally, we are defining a login() method, which is going to be called when the app receives a POST or GET request.
This method basically pulls the data from the form we defined in login.html, loads the user based on the provided username in the form, checks the password and if the password is correct it will call the 2-factor authentication method and waits for the user response from their phone.
So first it pulls the data from the login.html form and validates whether it is following the format described in SignInForm.
Next, by passing the username to load_user it will pull the user data for that username.
Then it checks whether the provided password is correct and if not, it will show an Authentication failed message to the user.
If the provided username and password are correct, it passes the user phone number to send_2_factor_authentication method to perform the 2-factor authentication process.
Next we wait for user's response in a loop, which via calling check_2fa method, checks every one seconds whether the two-factor authentication of the user is confirmed.
In the check_2fa method we basically look for the user phone number in two_factor_authentication table, check whether such record exists and if the record shows confirmation of 2fa or not.
Finally, if the check_2fa method confirms that the user's two-factor auth passed, we log in the user via login_user method and show a Welcome message.
After that, we will delete the user 2fa record from two_factor_authentication table using delete_2fa function.
The last part is to define the host and the port we want to run the flask app on:
flask_app.py
...


if __name__ == "__main__":
   app.run(host='0.0.0.0',port=8080,threaded=True)
Now we can run the app in the terminal like this:
python flask_app.py
After that, we can open a web browser, go to "http://0.0.0.0:8080/login" to view the login page:
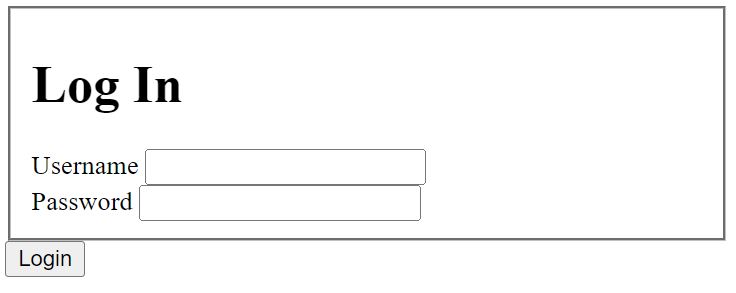
Providing the username and password (in this example username is set to "testuser" and password to "ABC123"), we should receive a text message on the provided phone number (in this example "18009998877"), and after confirming the two-factor authentication:

We should be redirected to the "Welcome" page:
Beside two-factor-authentication, there are other things you can do with CronDock:
Using CronDock you can programatically create cron jobs that run on a frequent basis
Please let me know if you have any question at support@crondock.com
I also have a good document which provides more detailed information on all the requests you can make to CronDock API.